


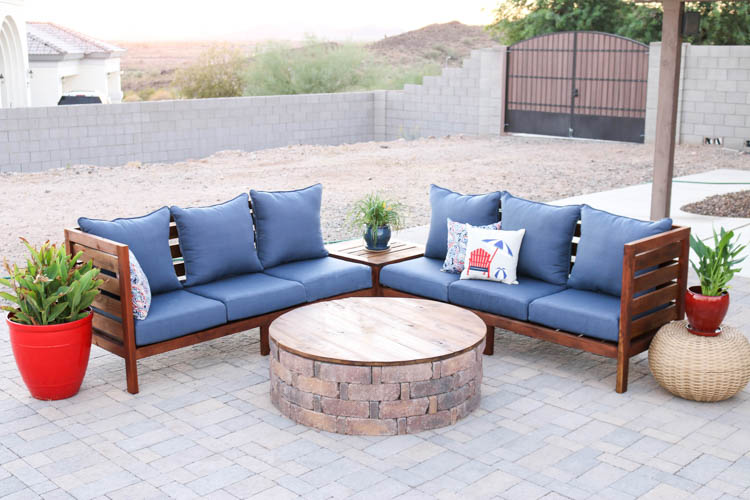
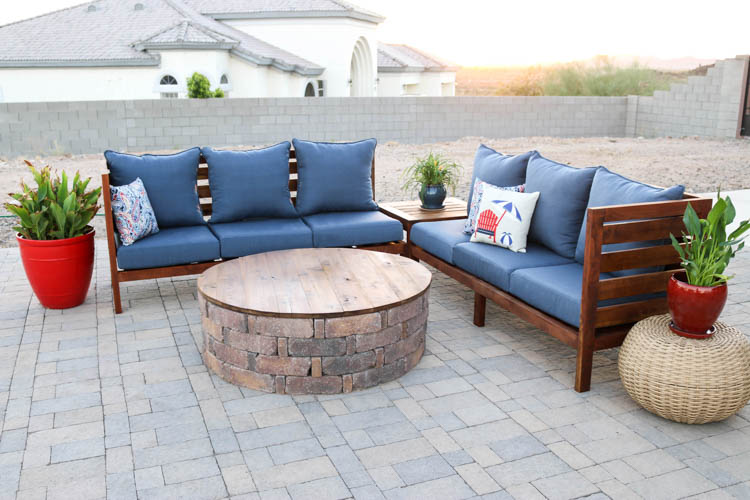
Hey there, friends! Today I’m partnering with Thompson’s WaterSeal to bring the indoors out and share this beautiful DIY Outdoor Sectional Sofa to help make your backyard living space complete! I know I have said it before, but this might be my favorite project to date! We’ve been slowly transforming our large backyard into a beautiful and functional outdoor space and this sectional set is one more big step in that direction. I’ve broken this project up into two steps, and today I’m sharing the instructions on how to build the sofa set. Be sure to download the printable plans for this project, which shares the full materials list, cut list, and step-by-step plans to build your own!

I built this project out of redwood and cedar, which I purchased at The Home Depot. Both materials are perfect for your outdoor projects and, when paired with Thompson’s WaterSeal products, they will stay looking beautiful even longer! I chose Thompson’s WaterSeal Penetrating Timber Oil in Teak because I wanted the wood to have a rich, dark color, but still be able to see the gorgeous grain.
Without further ado, let’s get started!

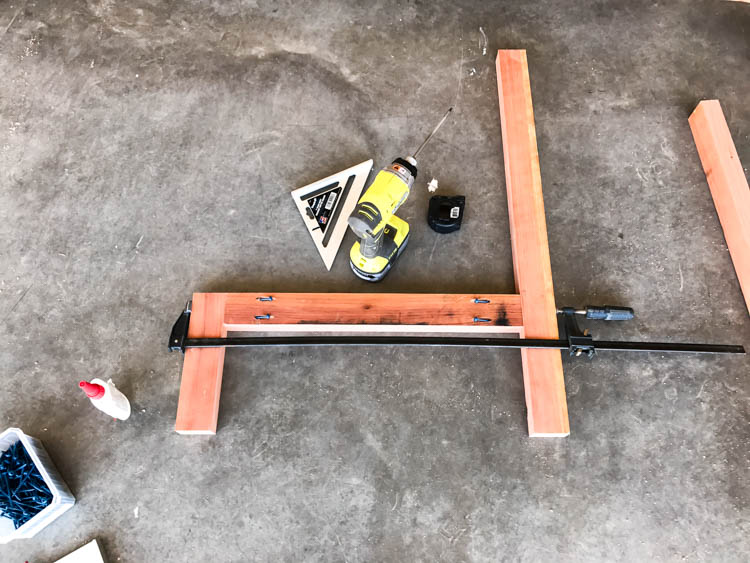
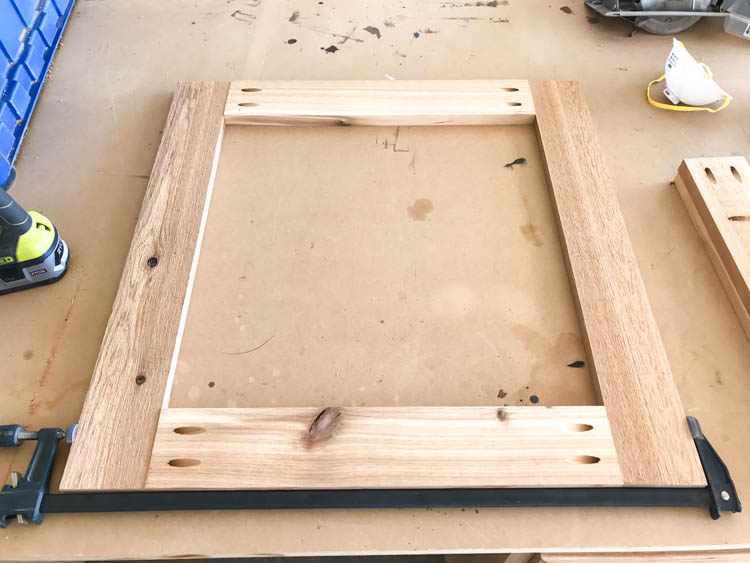
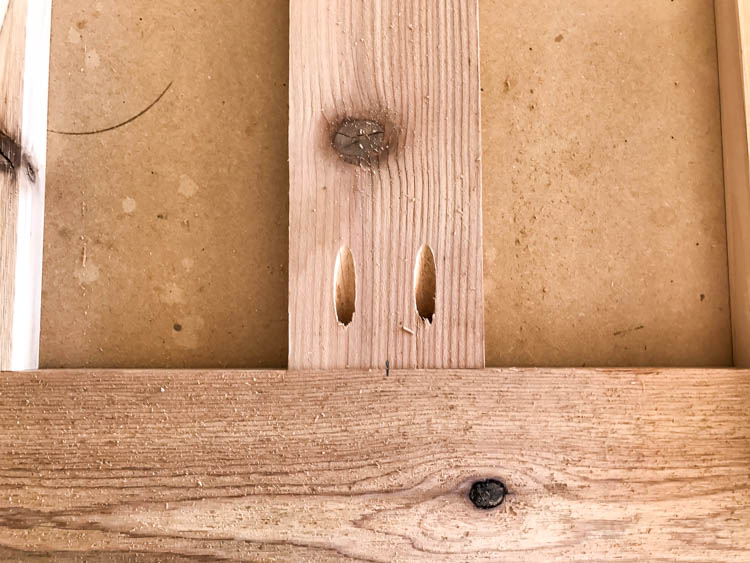
To get started on the frame of the sofas, I built the ends first. I drilled 1 1/2″ pocket holes into the horizontal pieces and attached them to the legs with wood glue and 2 1/2″ pocket screws. I used the Kreg blue coat pocket screws, which are specially made for outdoor projects like this.
Once the sides of the sofa were assembled, I attached the 2×3 stretchers, again drilling 1 1/2″ pocket holes and connecting them with wood glue and 2 1/2″ pocket screws.
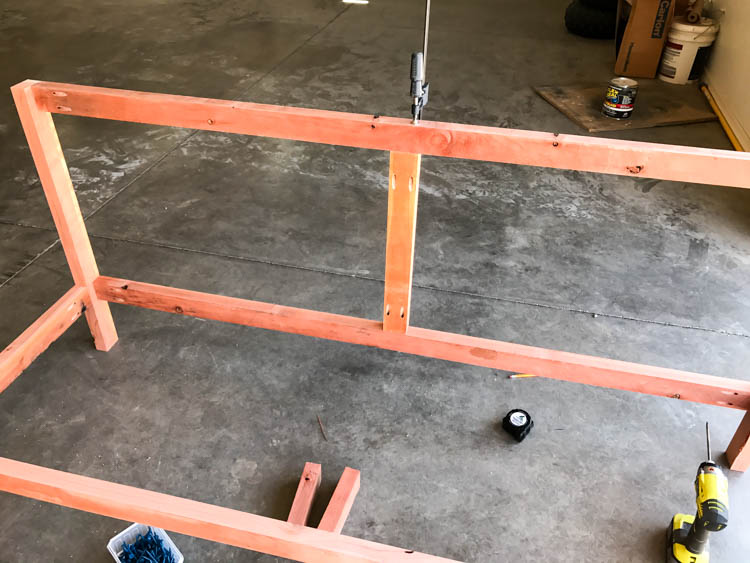
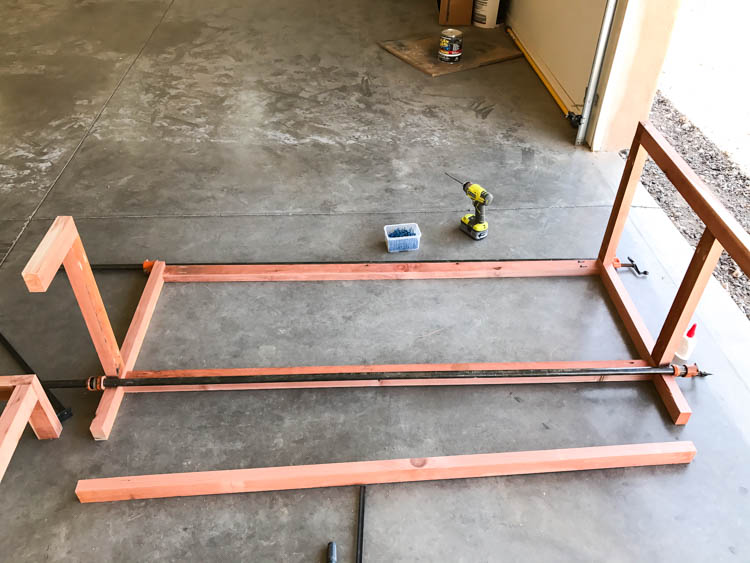
These sofas are 6′ long, so to add extra stability, I added a center support to the back of the frame as well as center legs (shown in the lower portion of the photo) to the front and back of the bottom of the frame. This ensures that these sofas can fit all of your friends and withstand the test of time.
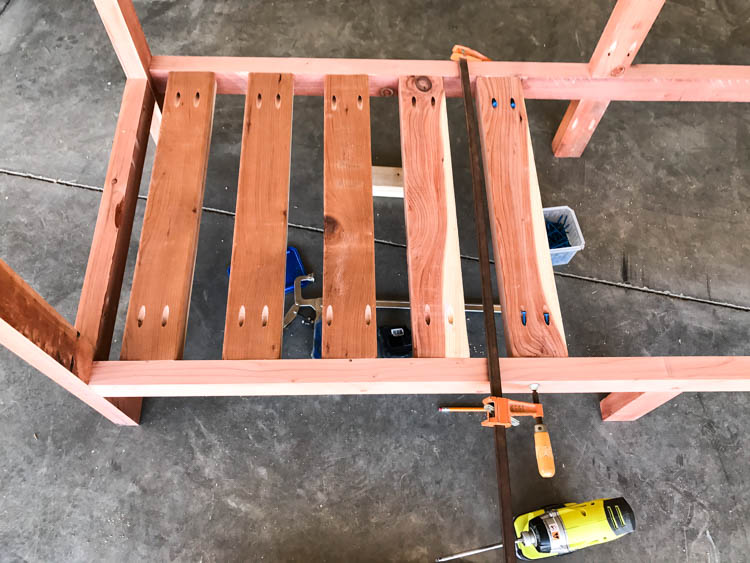
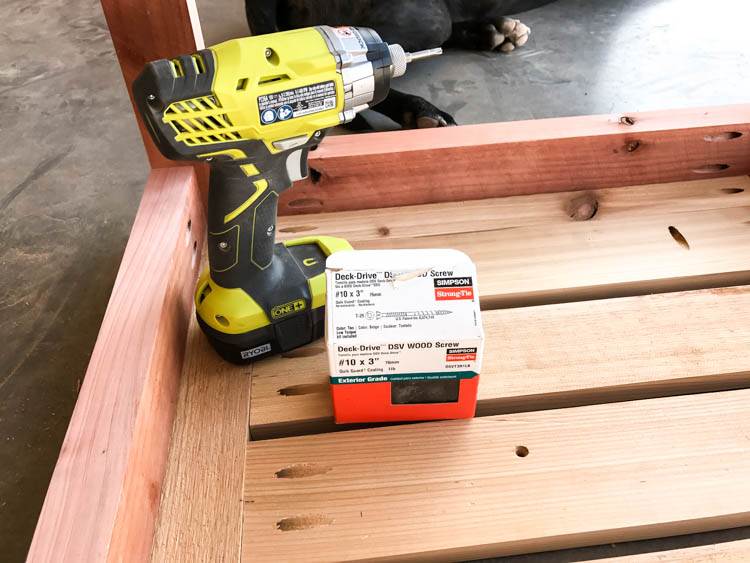
Once both sofa frames were assembled, I added the 2×4 seat supports. I didn’t measure them, but spaced them approximately 2 3/4″ apart and attached them with 2 1/2″ pocket screws.
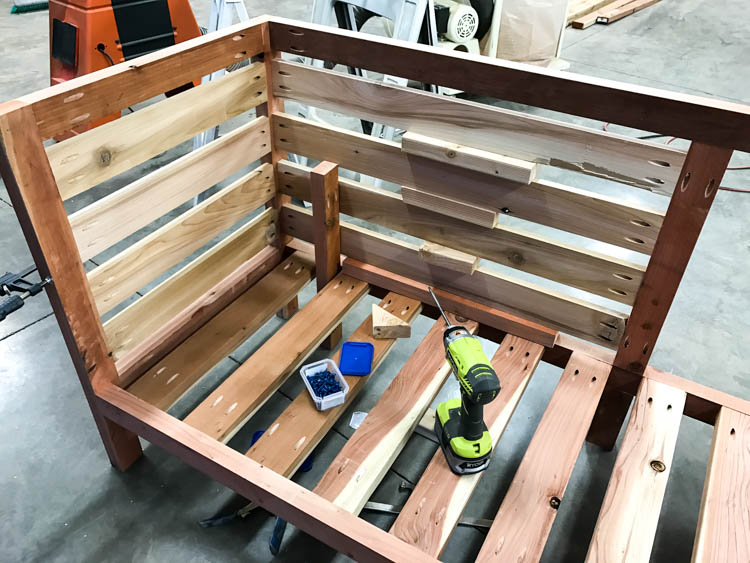
Next, it was time to attach the backs and sides to the sofa frames. I used cedar boards, which are sold as 7/8″ thick; however, I planed them down to 3/4″ thick. I drilled 3/4″ pocket holes into each end and spaced them 1 1/2″ apart. Scrap wood made for excellent spacers for this step.
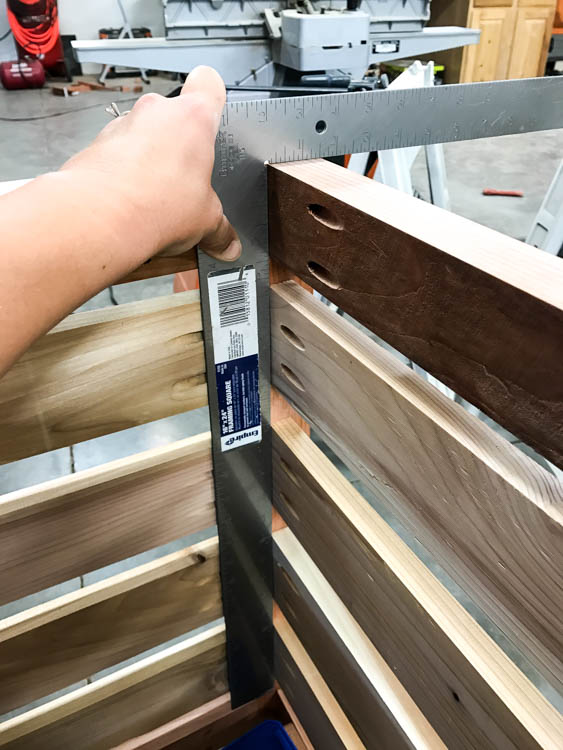
On the sides, and the center support of the sofa backs, the cedar boards sit flush with the inside edge of the 2×3 frame pieces. For the corners, they sit about 3/4″ in. To make sure they were attached exactly where they should be, I used a carpenter’s square to line up the slats, then attached them with 1 1/4″ pocket screws.

For the corner of the sectional, I built a low side table to bring it all together. Partly because I couldn’t find a corner cushion that matched, but mostly because nobody wants to be the one to sit in that awkward corner seat. This little table adds an extra space to sit drinks, magazines, plants, or whatever you like. I built the frame of the table from 2×3 redwood, attaching the pocket joints with 2 1/2″ pocket screws and wood glue.
The top of the table was built with cedar boards. I assembled the top of the table in a square frame, drilling 3/4″ pocket holes and attaching the pieces with 1 1/4″ pocket screws.
 For the remaining pieces to fill in the table top, I started by adding the middle piece first. I found center on the outside frame of the table top as well as the board and marked them with a pencil on both ends. This allowed me to line everything up to attach it with pocket screws. The boards on each side of the center board were spaced approximately 1/2″ off the center board. The two remaining outer planks were attached flush against the outer frame of the table top. All of these again were attached with wood glue and 1 1/4″ pocket screws.
I didn’t want to have exposed screws in the table top, so I flipped the table top over and lined up the frame on top of it.

I attached the frame of the table to the top with 3″ deck screws, counter sinking them just slightly into the underside of the frame.
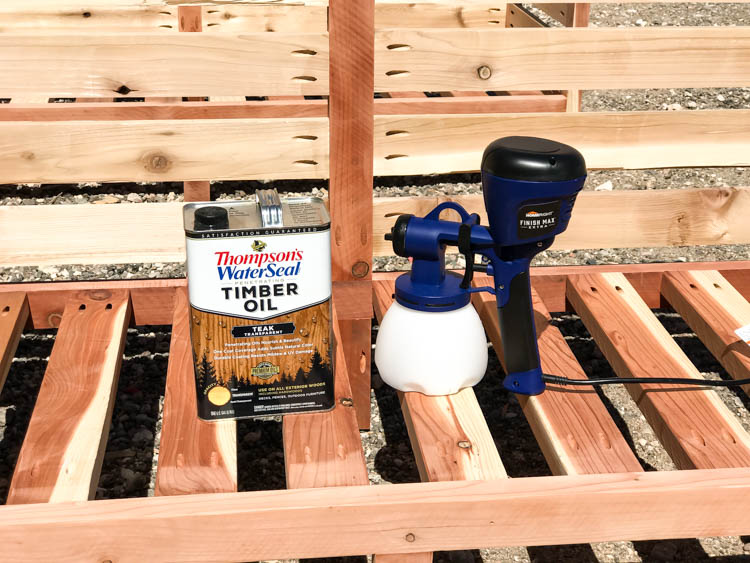
Once everything was completely assembled, it was time to finish it! Stay tuned for that post later this week where I’ll talk about the Thompson’s WaterSeal Penetrating Timber Oil finish I chose and why. Don’t forget to download the printable plans for this project to build your own gorgeous patio sofa set!
DISCLOSURE: I was provided product and/or compensation for this post. All opinions and ideas are 100% my own. For more information, please read my full disclosure policy.