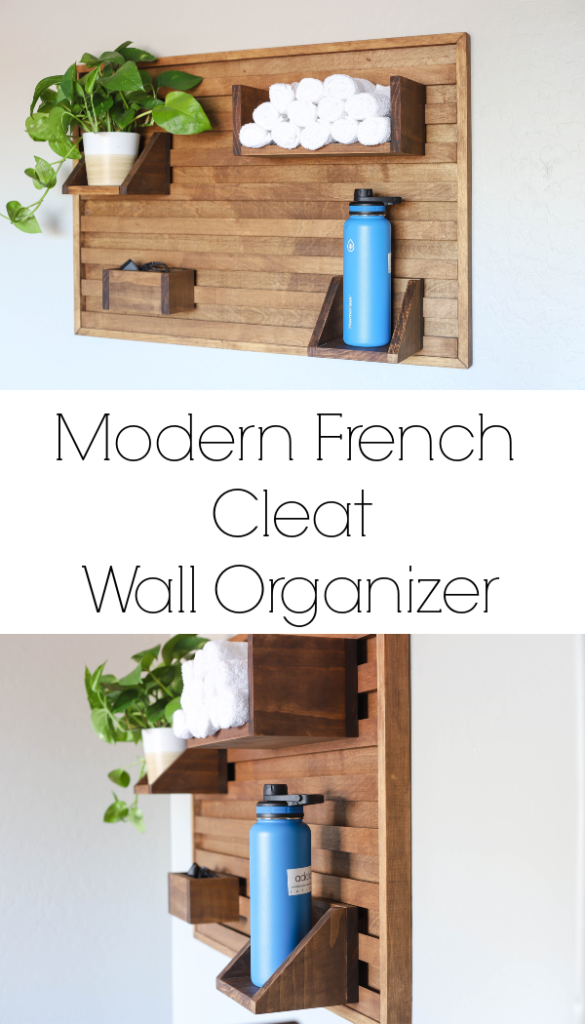
A French cleat is not only a strong anchor point, but it also makes for a great organization solution. Learn how to build a French cleat wall organizer like this to organize your office, tools, or even your home gym. 
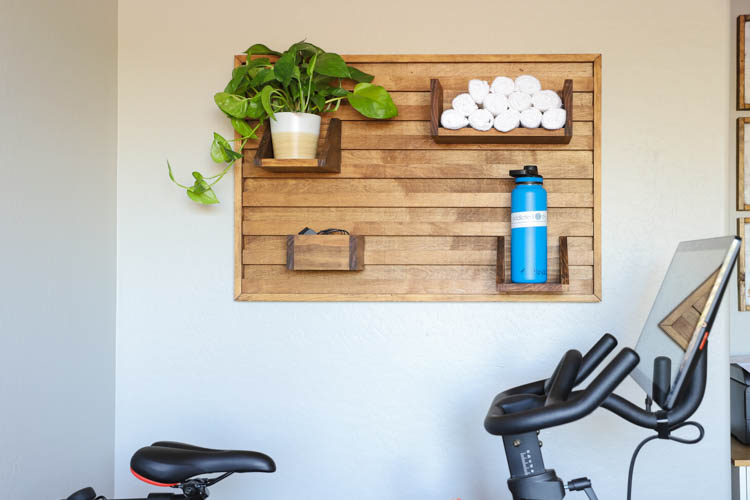
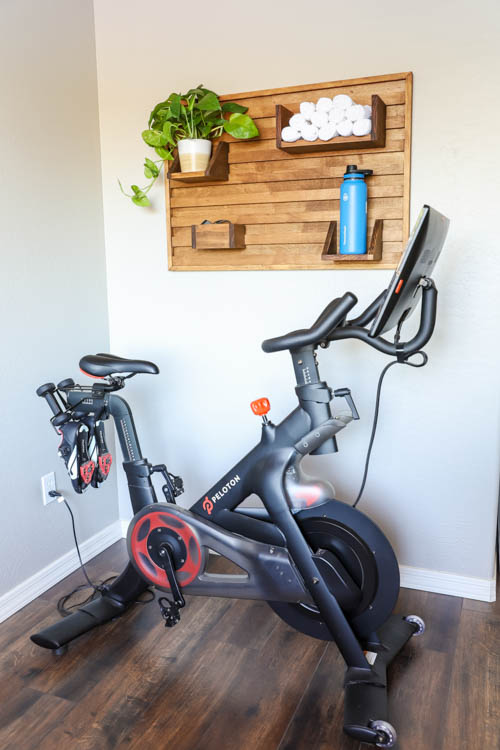
Almost two years ago, I took a huge leap and invested in a Peloton bike. I absolutely love my bike and the ability to work out from the comfort of home. For a while, I had my bike out in the great room of our house, but decided it would be better suited in my office. Since moving it into my office, I’d been trying to come up with ways to keep my water bottle nearby when I’m riding, and also a place to store my heart rate monitor and ear buds. Plus, I was getting a little tired of clipping in, only to realize I’d forgotten my towel. I came up with this French cleat wall organizer to keep all of my workout necessities organized in one place, AND it looks like wall art! I love projects that pull double duty.
UPDATE: If building this organizer just isn’t in the cards for you, you can also purchase one made to order! Click here to order!
DIY Organization Challenge
If you remember, last month I kicked off a monthly DIY challenge with a bunch of my blogging friends. This month’s theme is DIY organization. Nineteen of us are joining together to bring you our organization projects and tutorials to help inspire you and your own organization goals. I’m linking to all of the projects in this challenge at the end of this post, so make sure you stop over and visit everyone!
How To Build A French Cleat Wall Organizer
Watch the video above to see how I built this project. I’ve also put together a step by step tutorial as well as printable plans showing you how I built this DIY French cleat wall organizer. You can purchase the printable plans HERE.
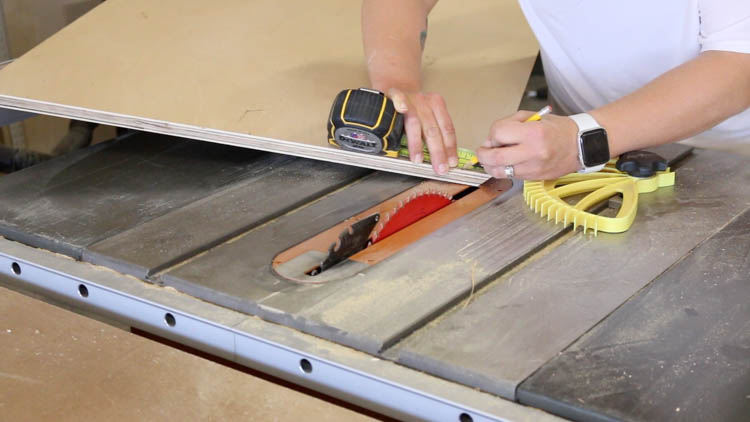
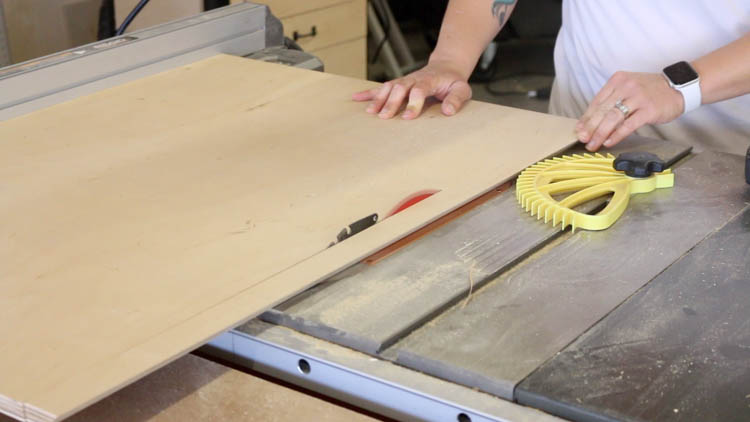
Step 1 – Cut The Plywood Backing

I cut 3/4″ plywood down to size on my table saw. I have quite the stockpile of leftover plywood from various projects, so I was able to use scraps for this. You can find all of the materials needed and cut list in the printable plans.
Step 2 – How To Cut A French Cleat
There’s several different ways you can cut French cleats. For me, I found the easiest way to do this was to tilt my table saw blade at 45 degrees and rip one edge down. I’d then mark the width of my cleat (1 1/2″) and turn the blade back to 90 degrees.
Once I lined up the mark on my plywood, I’d rip down the cleats. This method does take a bit longer, but given how narrow the cleats are, it felt safer to me to follow these steps. This project only requires 8 cleats, plus one more at 1 1/4″ for the organizers that hang on the wall system.
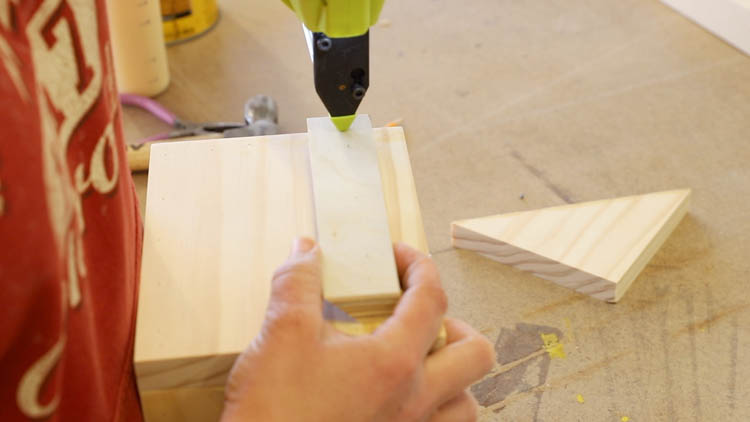
Step 3 – Nailing French Cleats to Plywood
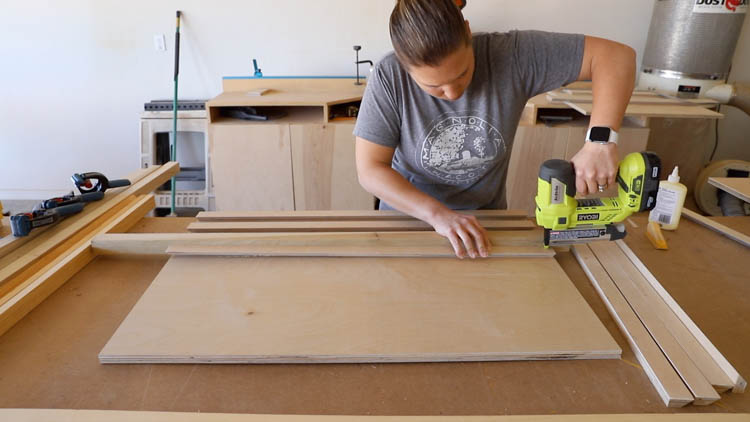
Once all of my cleats were ripped to size and cut down to length, I glued and nailed them to the plywood backing. I started by lining the bottom cleat up flush with the bottom edge of the plywood. Once that cleat was secured with glue and nails, I used a piece of 1 1/2″ wide scrap wood as a spacer and continued attaching the remaining cleats. I used a pin nailer for this, but a brad nailer would also work. You’ll just have to fill the holes when you’re done.
Step 4 – Attaching A Frame To The Organizer
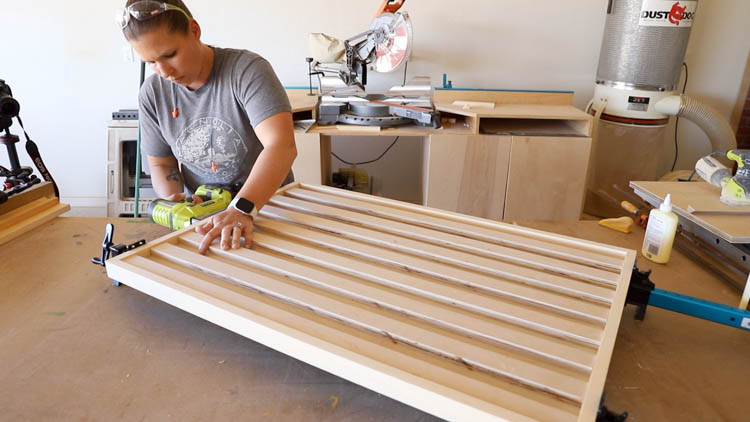
To finish off the organizer, I attached a 1×2 frame around all four sides. I again used wood glue and 1 1/4″ pin nails to attach it.
Step 5 – How to Finish The Wall Organizer
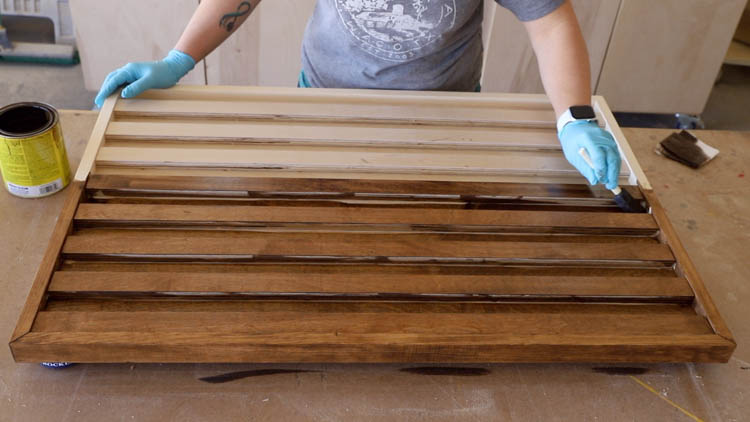
The French cleat wall organizer can be stained, painted, or even left natural. The sky’s the limit when it comes to your tastes and styles. I chose to finish mine in special walnut to match the rest of the furniture in my office and I love how it looks against the gray walls!
Step 6 – Building The Organizers
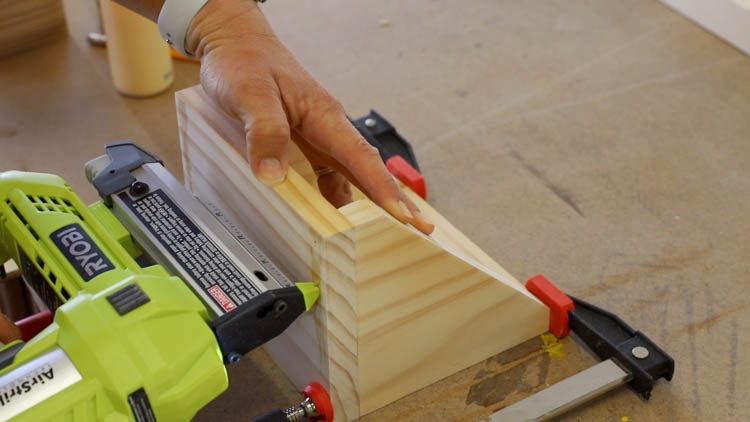
I mentioned earlier that I wanted this to hold all of my workout necessities while I’m riding my Peloton. One of the most important things for me was a place to put my 30 oz water bottle. I built a ledge style holder out of some 1×6 pine and you can find all of the measurements for that in the printable plans. I actually built two because, after all, I wanted it to also look pretty. One now also holds a plant:)

Another big want for me was a place to store rolled towels. I always hate when I get on the bike and then realize I have to get off, hobble through the house in my bike shoes, and grab a towel. Now I can hold a dozen or so within arm’s reach. I also built an organizer to hold my heart rate monitor and ear buds, which I’ve included in the printable plans.
A Beautiful and Functional Wall Organizer
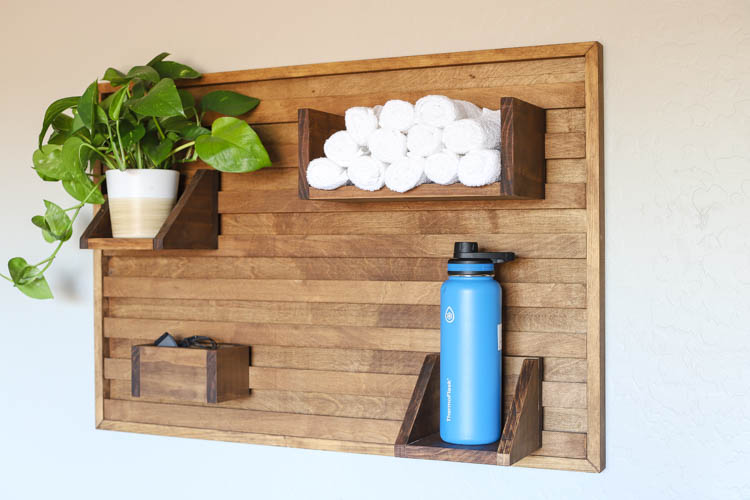
I could not be happier with how this French cleat wall organizer turned out! I love when a vision comes to life! It’s both functional organization with a dash of style. The organizers can be customized in any number of ways to make this work for whatever your need may be. Even the size of it can be changed up to go even bigger, or scale it down. Whatever suits your needs best! Just use the printable plans as your guide and customize it any way you like.
DIY Organization Projects
Now that you’ve looked over my project, I’d love for you to stop by and visit the other bloggers participating in this challenge! They’ve all put together their own DIY organization project tutorials and you’ll definitely not want to miss them!
The House Of Wood
House Becoming Home
Anika’s DIY Life
100 Things 2 Do
RemodelaCasa
Jaime Costiglio
The Created Home
Woodshop Diaries
The Inspired Workshop
Her Toolbelt
Reality Daydream
My Love 2 Create
My Repurposed Life
Ugly Duckling House
Hazel and Gold Designs
Place Of My Taste
Joyful Derivatives